

Secret Floating Shelf
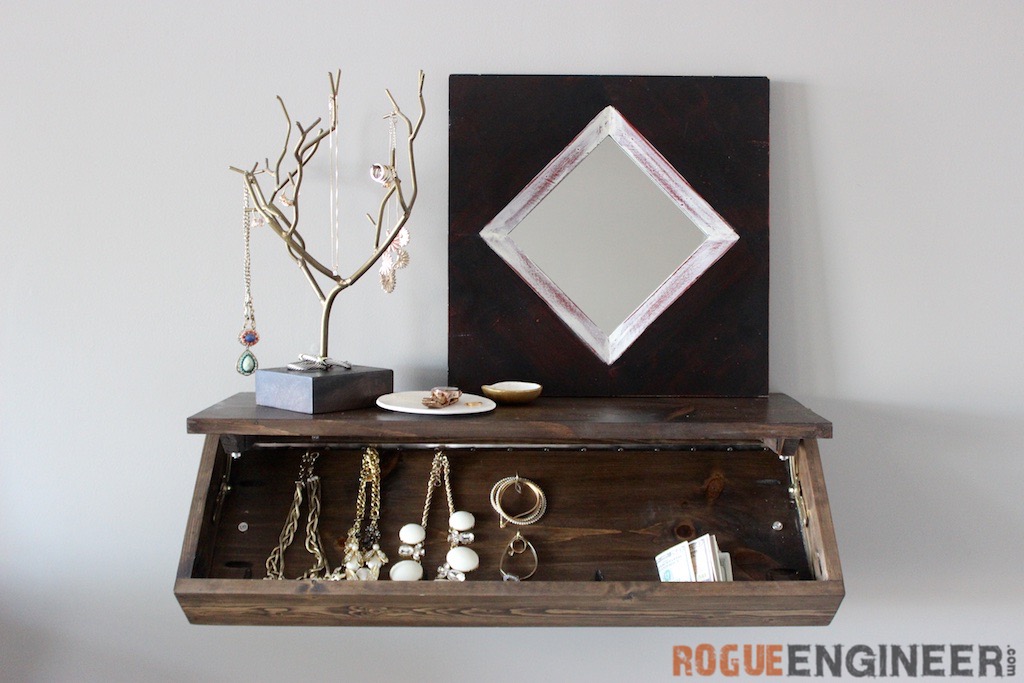
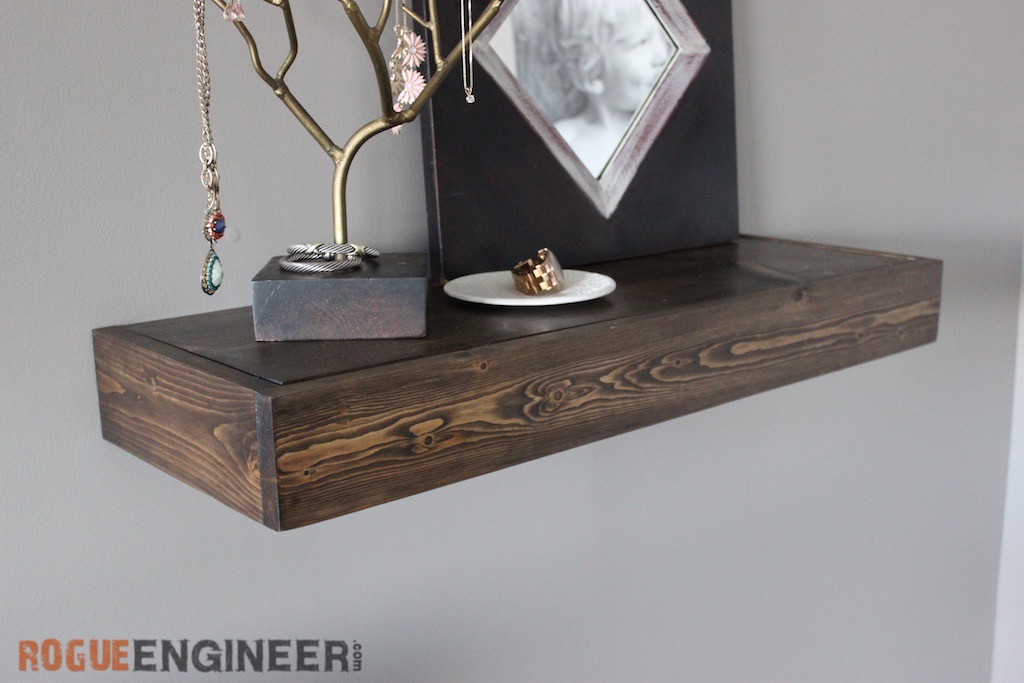
Quick answer: This secret floating shelf looks like an ordinary chunky floating shelf — 31-5/8″ × 10-3/4″ × 3-1/2″ — but the bottom is a false panel on a piano hinge that drops open to reveal a hidden compartment running nearly the full length of the shelf. Friction lid supports hold it shut until you want in. Built from pine 1x boards with pocket screws for about $30. Free plans with cut list below; the printable plans put it all in one PDF. Designed, built, and documented by Jamison Rantz.
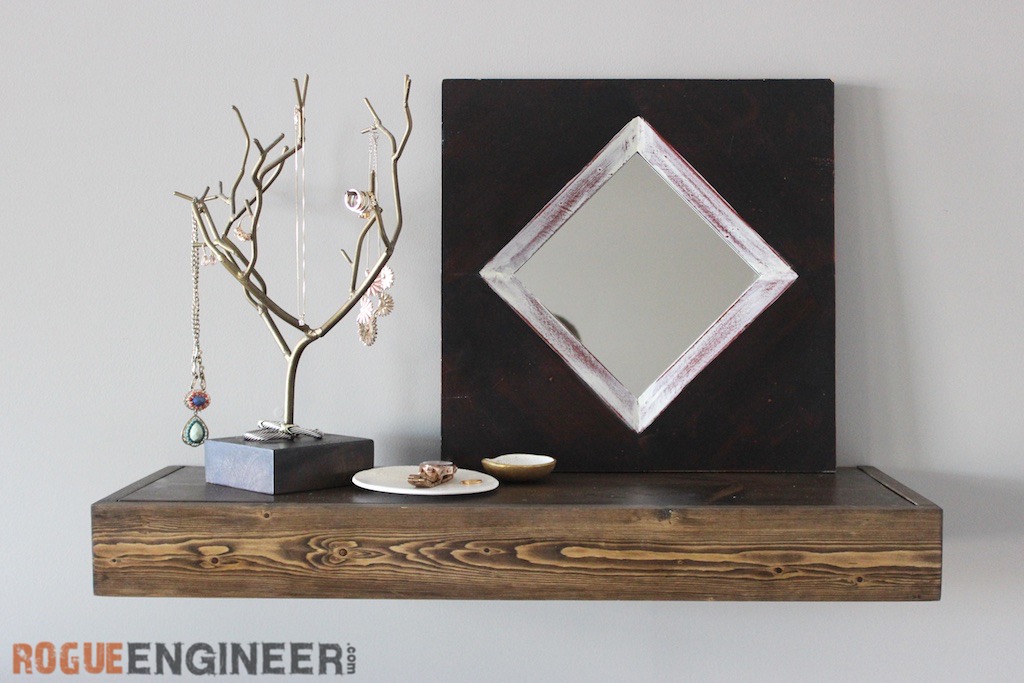
I recently designed a floating shelf for Whitney from Shanty2Chic and it had me thinking about all that wasted space inside the floating shelf. Then the light bulb went off! A false bottom with hidden storage! That was it! So off to the drawing board I went. After a few hiccups, this is what I came up with. And, believe it or not, I built it for about $30!
Just want clean, open shelves with nothing to hide? My regular floating shelf plans are the place to start — that post has a built-in shelf calculator that sizes the cut list to your exact wall.

Tools & materials
Dimensions
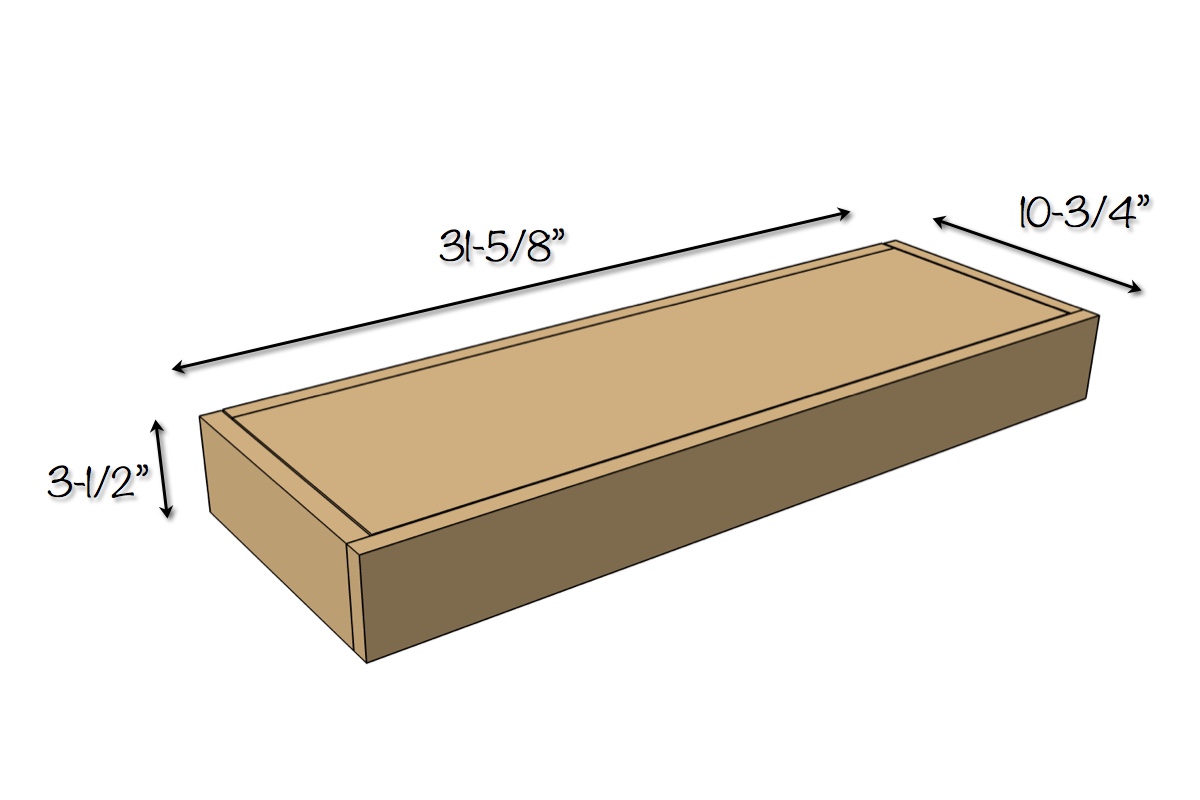
Cut list
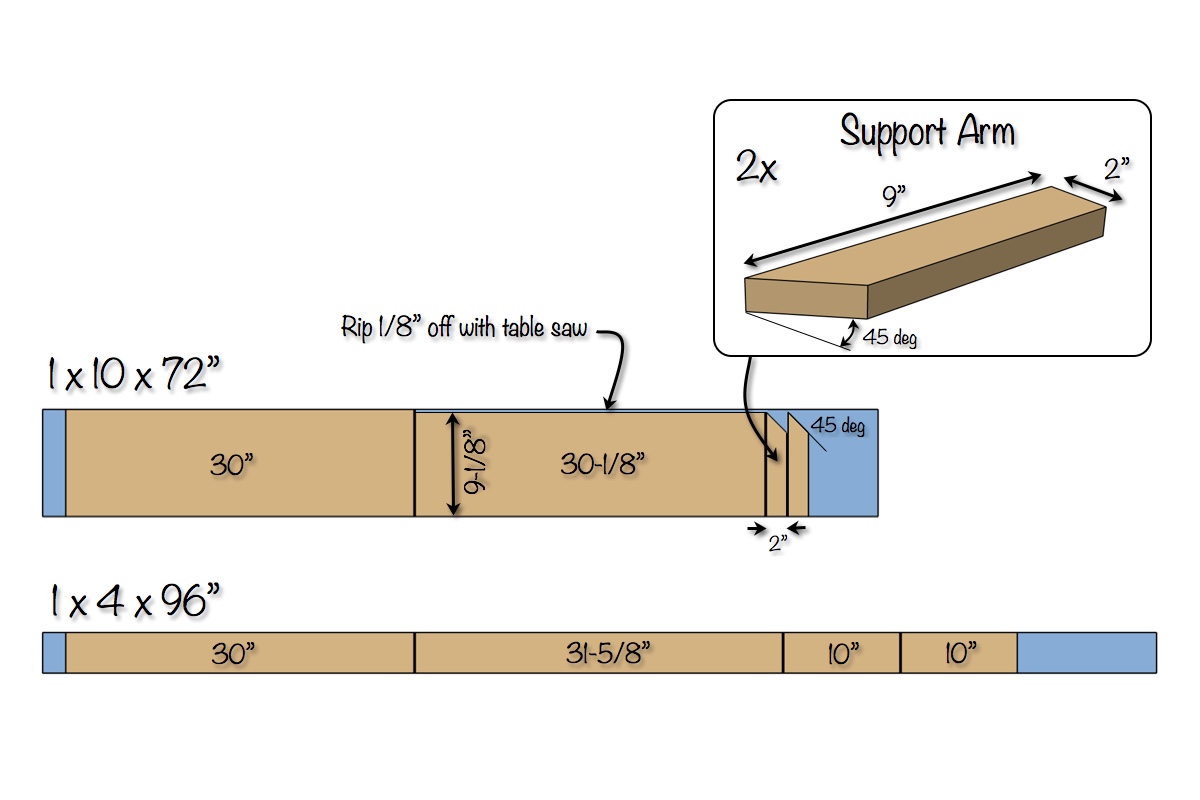
Secret shelf plans
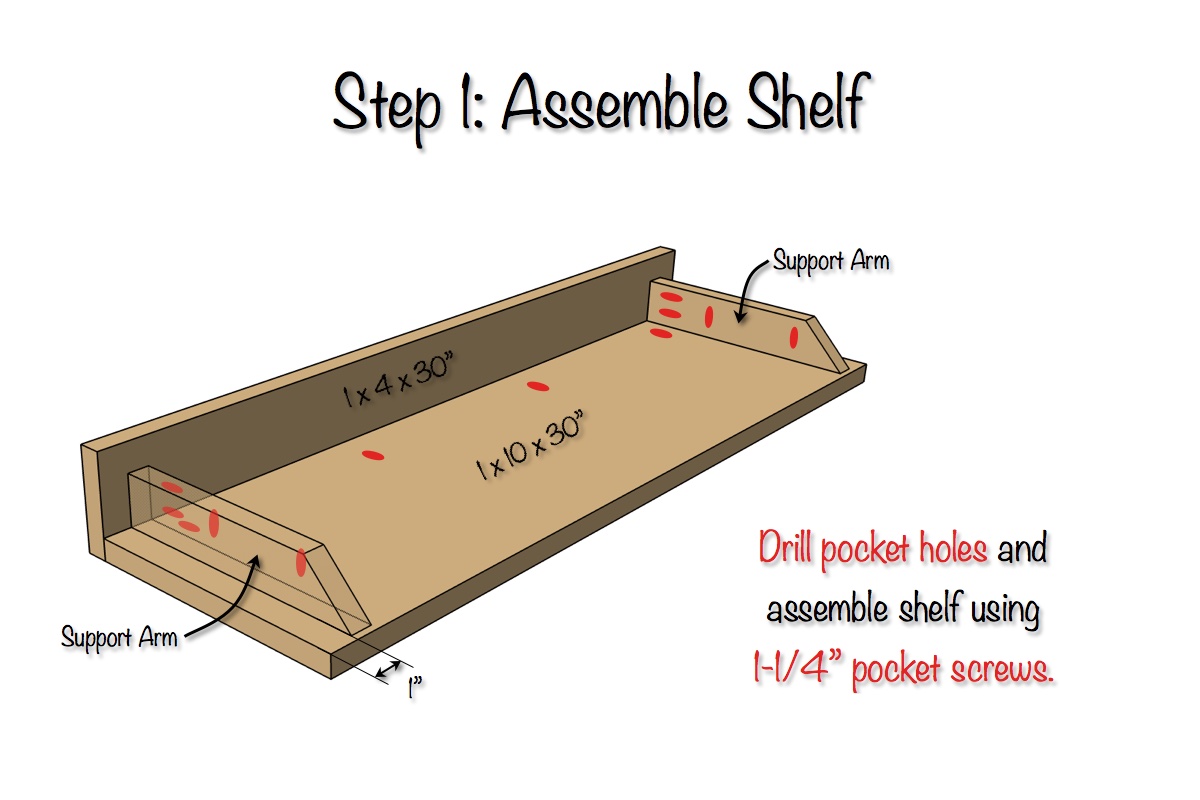
Step 1: Assemble the shelf
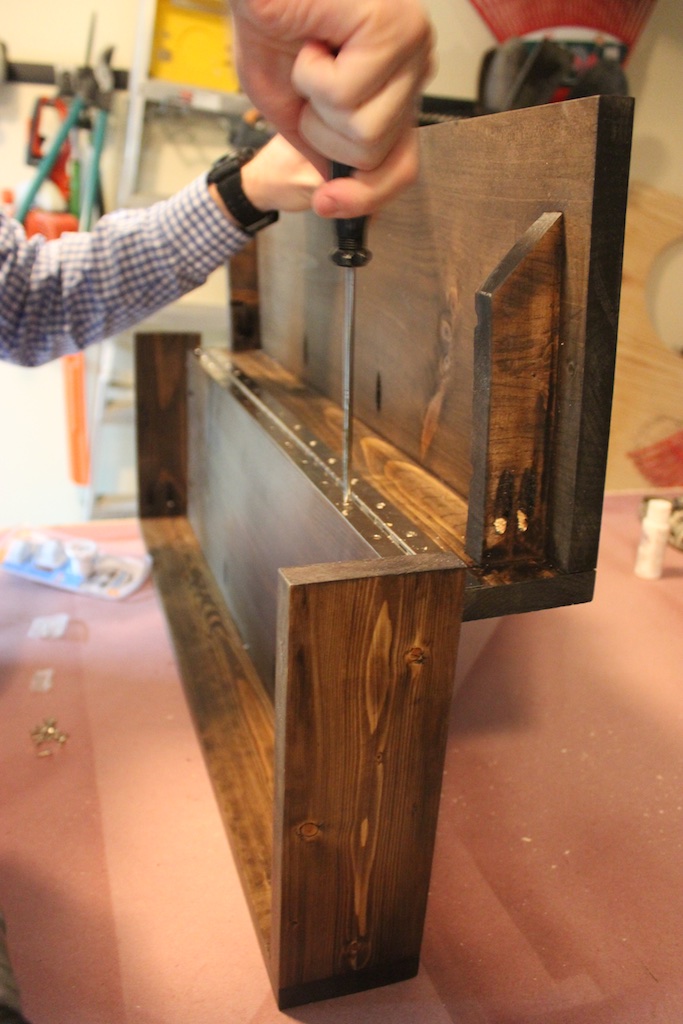
Drill pocket holes and assemble the shelf body with 1-1/4″ pocket screws: the 1×4 × 30″ back, the 1×10 × 30″ top, and the two angled support arms. Set the support arms in 1″ from each end — that setback is what leaves room for the false bottom’s end caps to close around them.
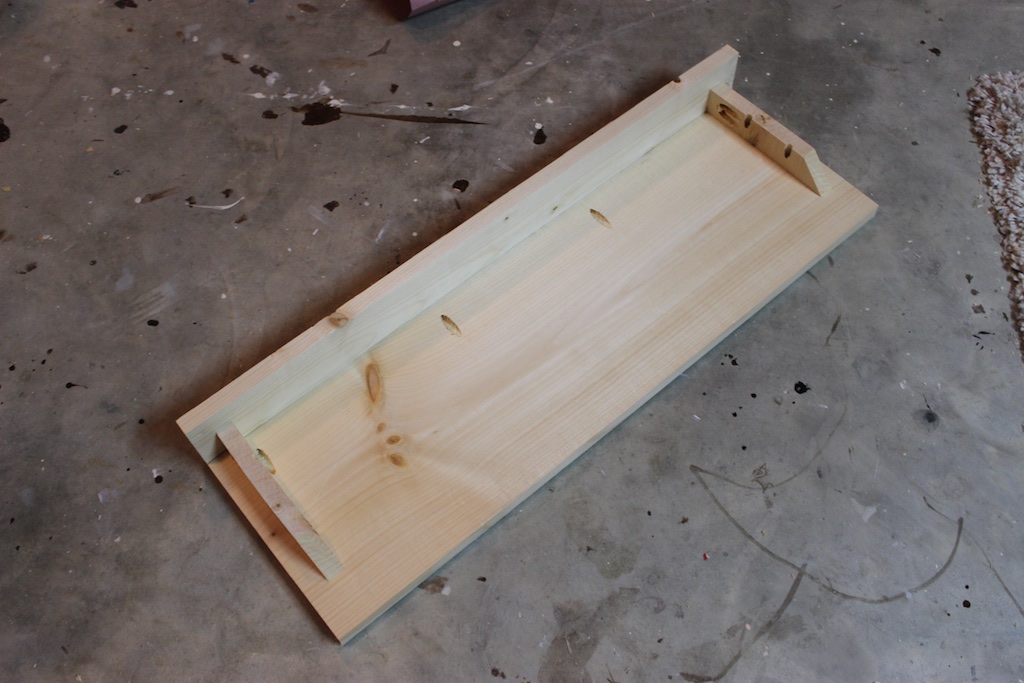
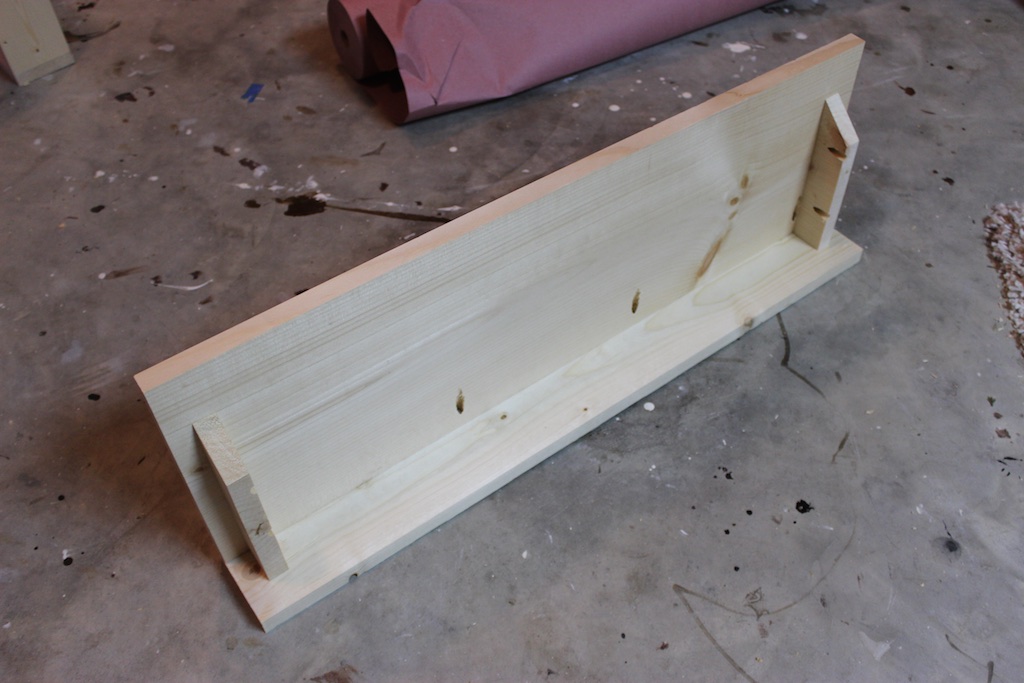
Step 2: Assemble the false bottom
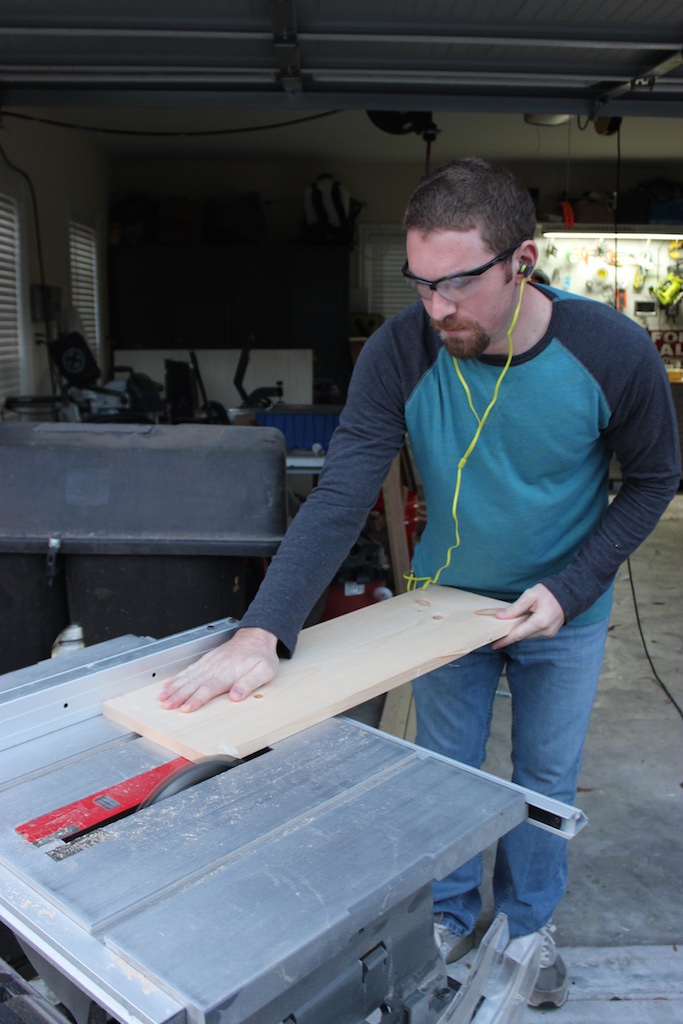
The false bottom is its own shallow tray: the 1×4 × 31-5/8″ face, the 1×9-1/8″ × 30-1/8″ panel (rip this one to width on the table saw), and a 1×4 × 10″ cap on each end. Drill pocket holes and assemble with 1-1/4″ pocket screws.
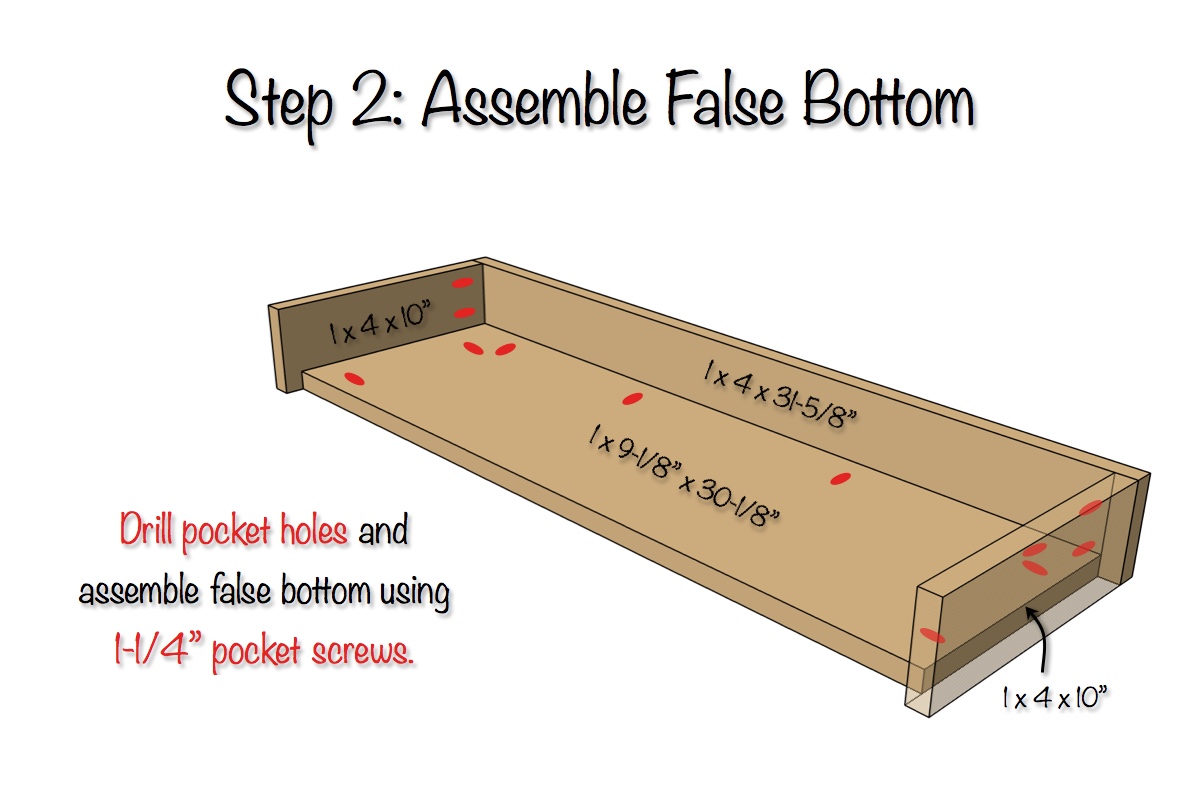
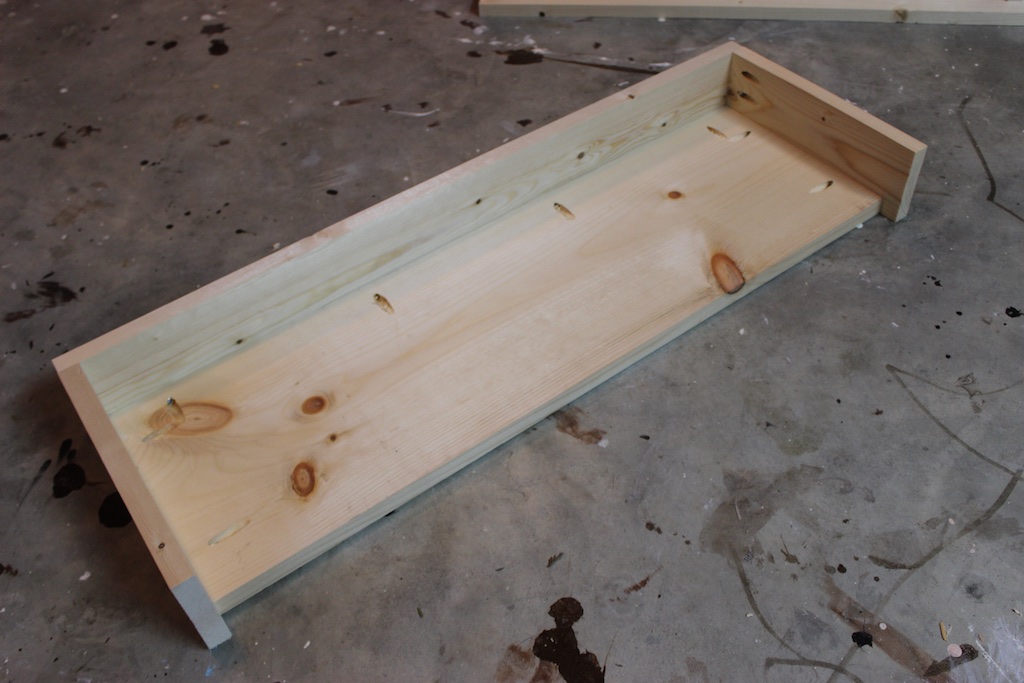
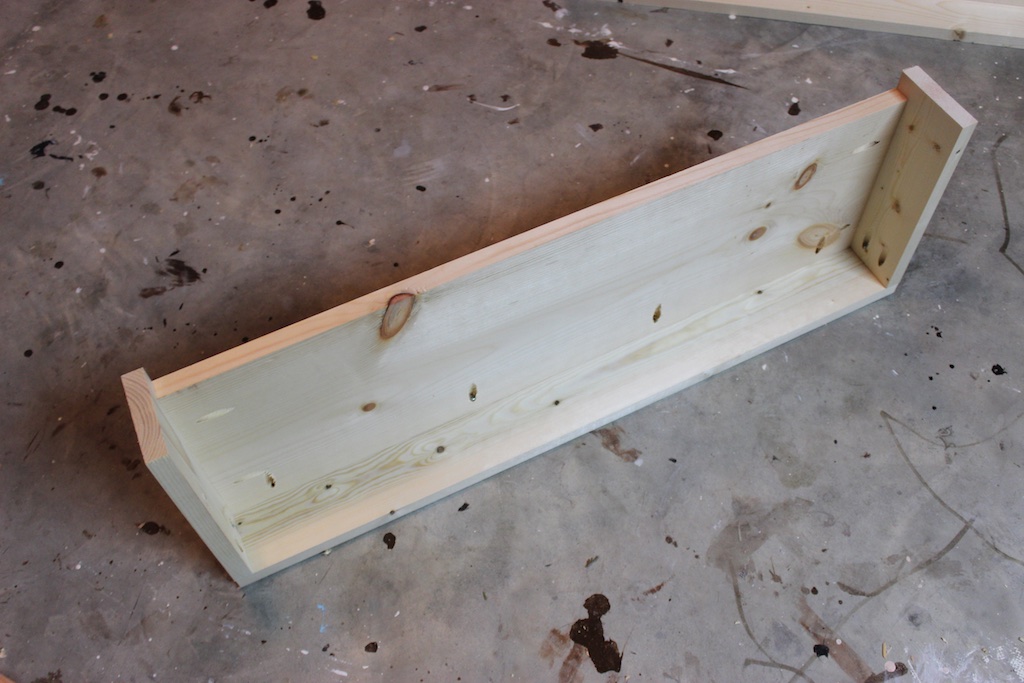
Finishing
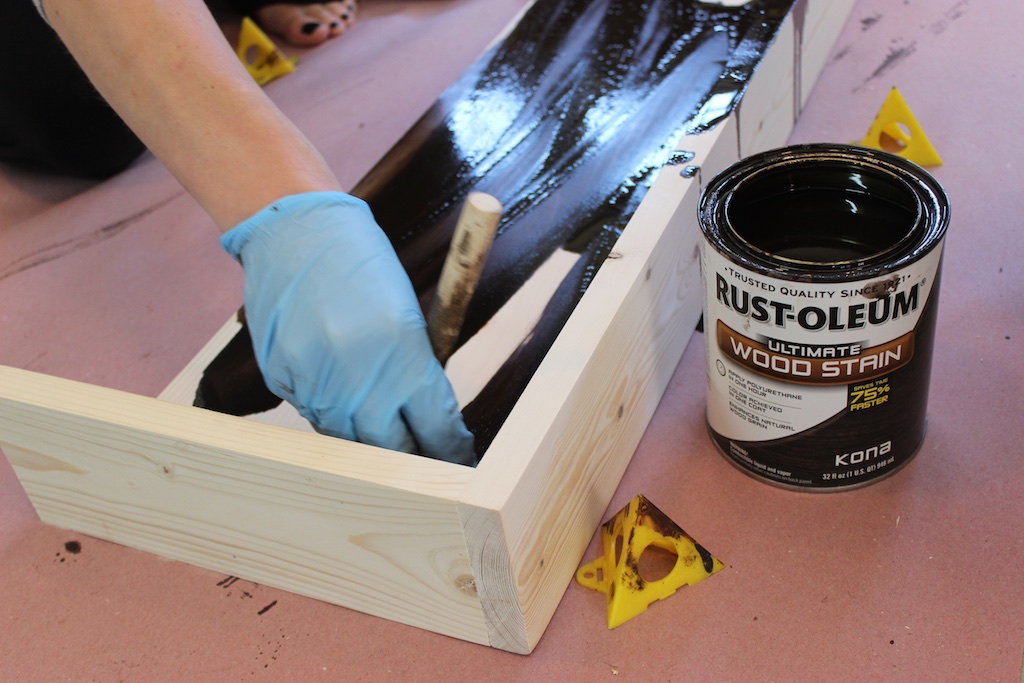
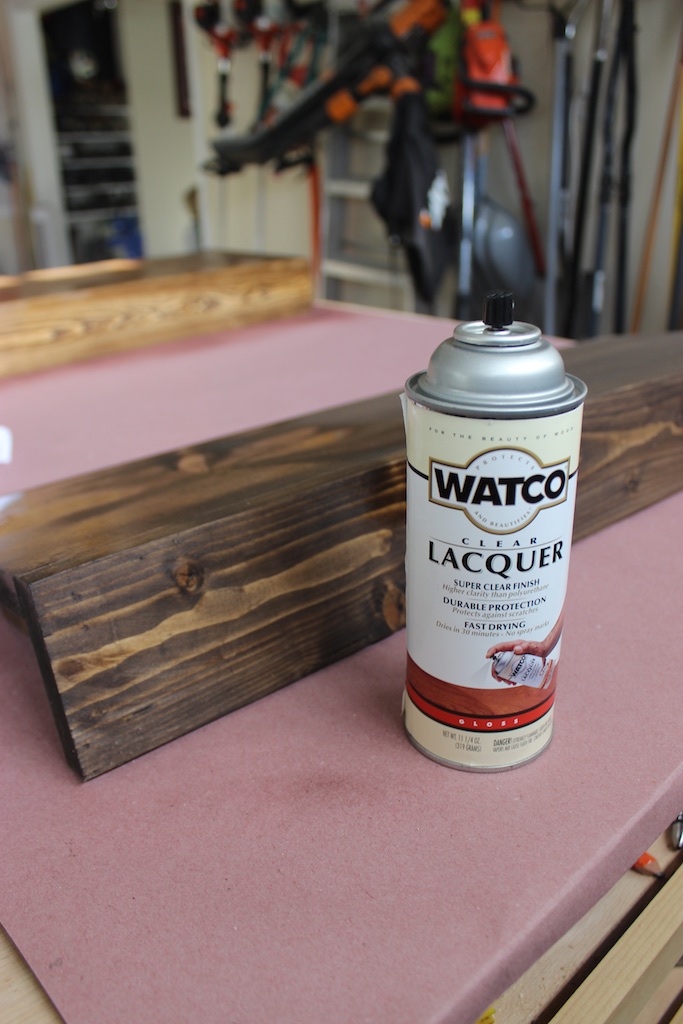
We decided to finish our secret shelf with Kona wood stain from Varathane. Stain both assemblies now, before the hardware goes on — it’s much easier than staining around a hinge.
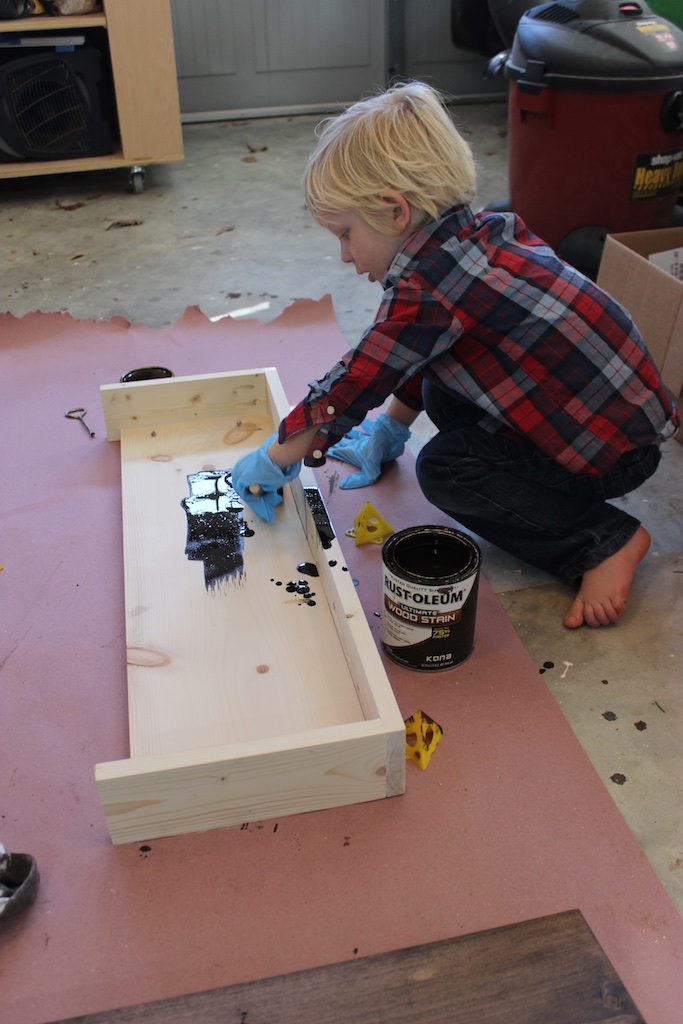
Our little helper!
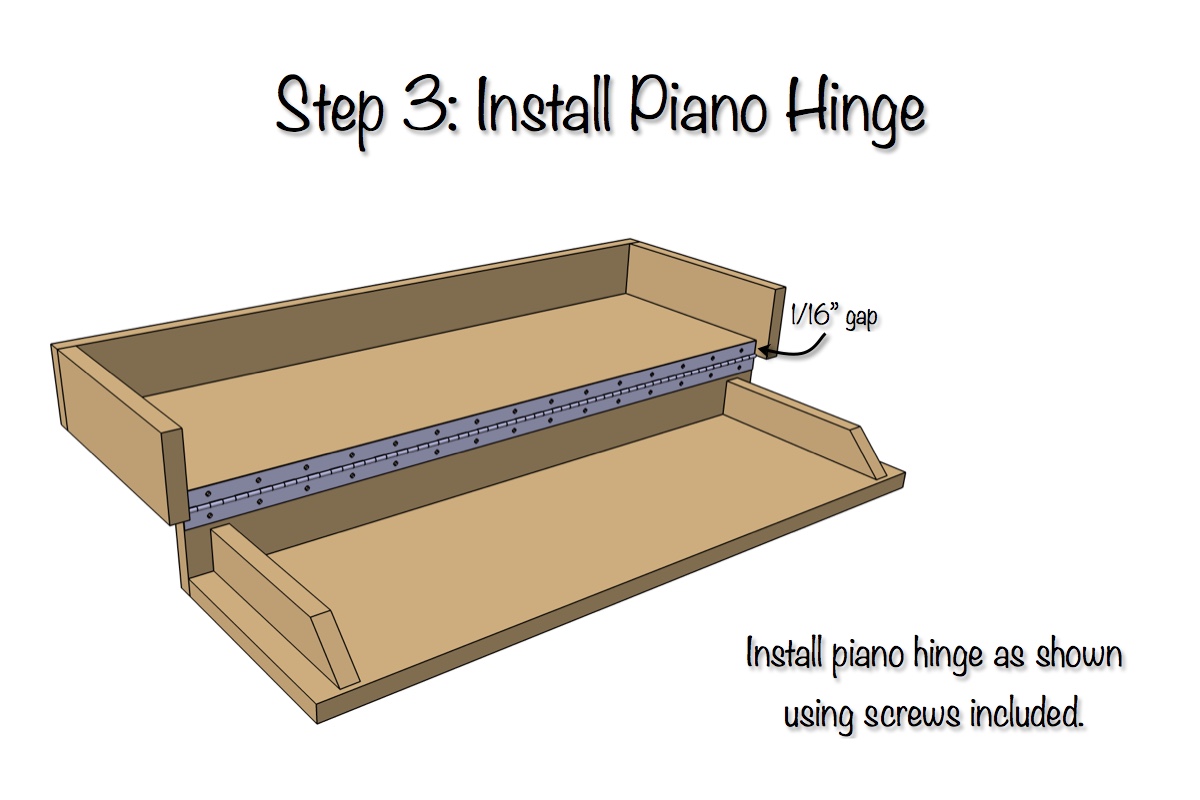
Step 3: Install the piano hinge
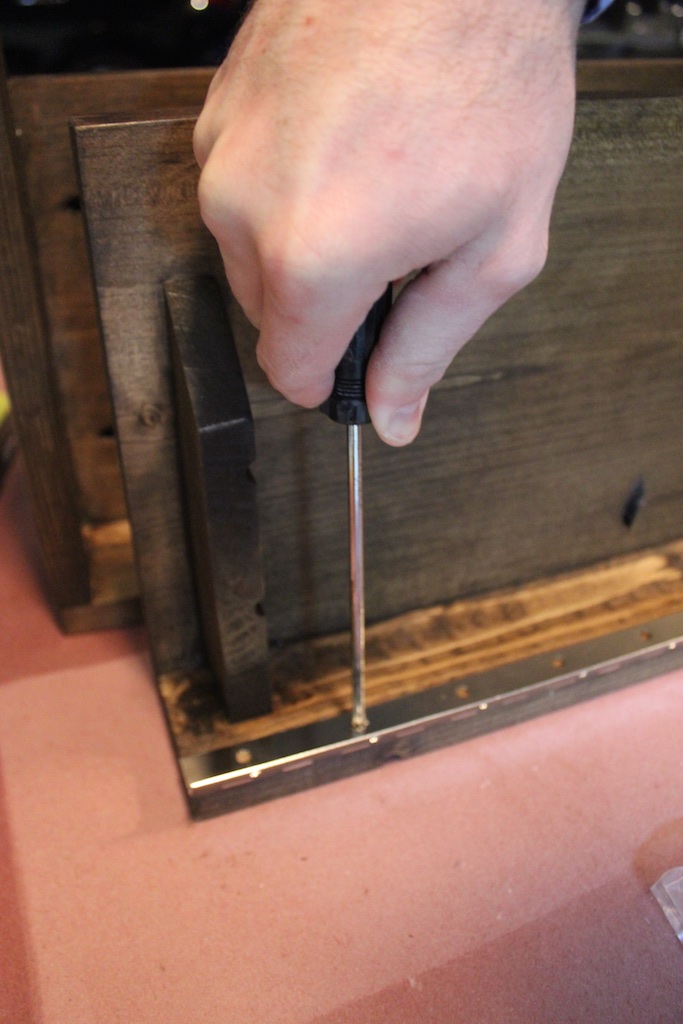
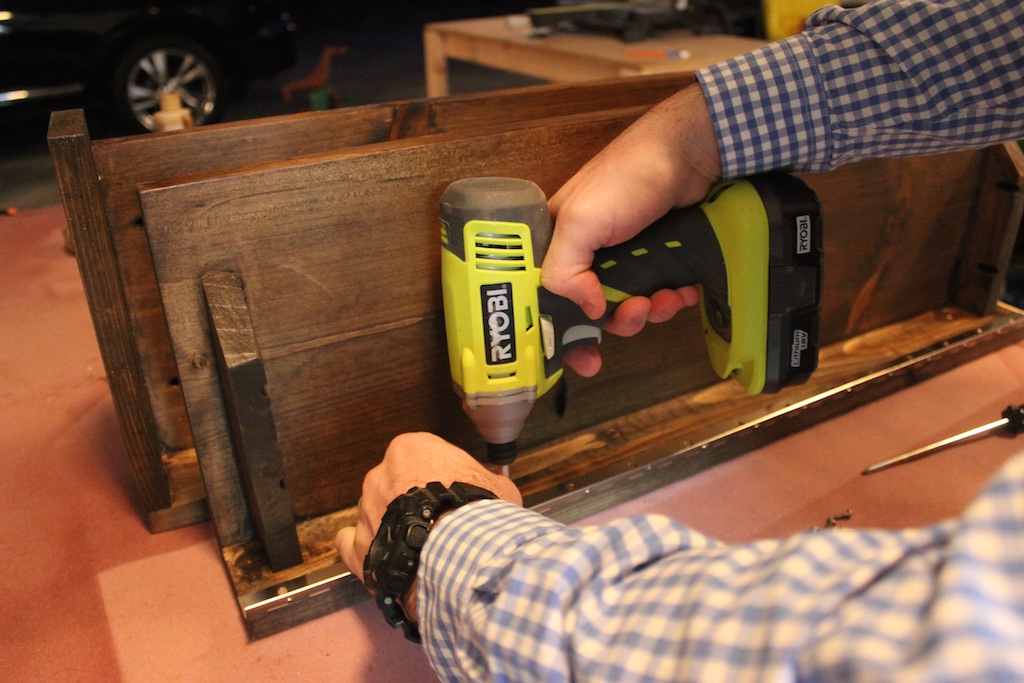
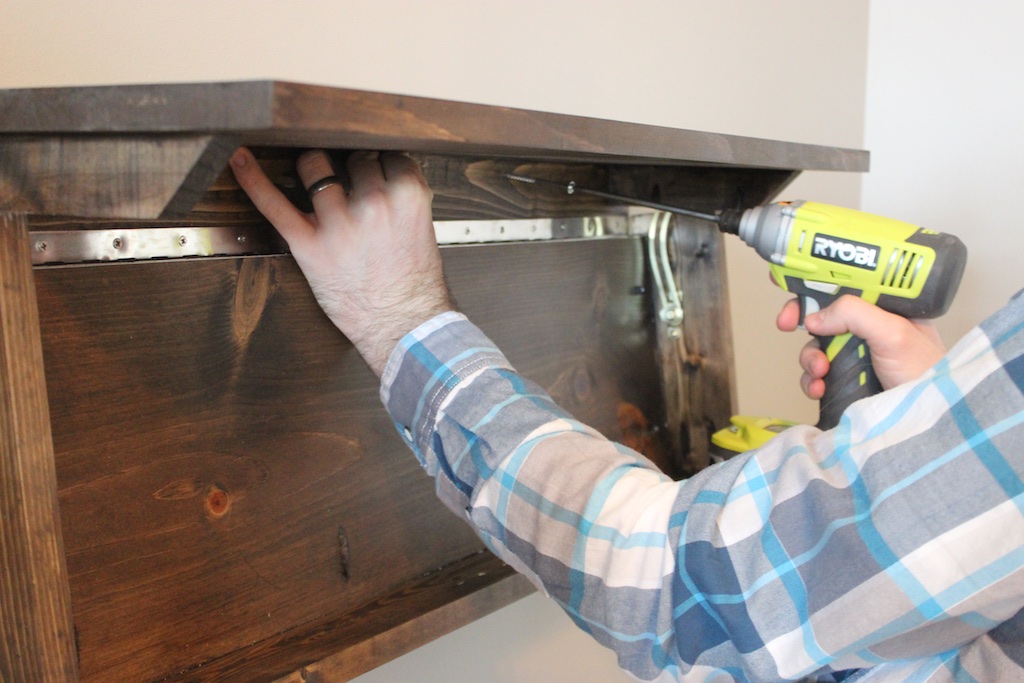
Screw the 30″ continuous hinge to the back edge of the false-bottom panel and the shelf body using the screws included with the hinge. Leave about a 1/16″ gap at the hinge line so the false bottom can swing freely without binding.
Step 4: Install the friction hinges
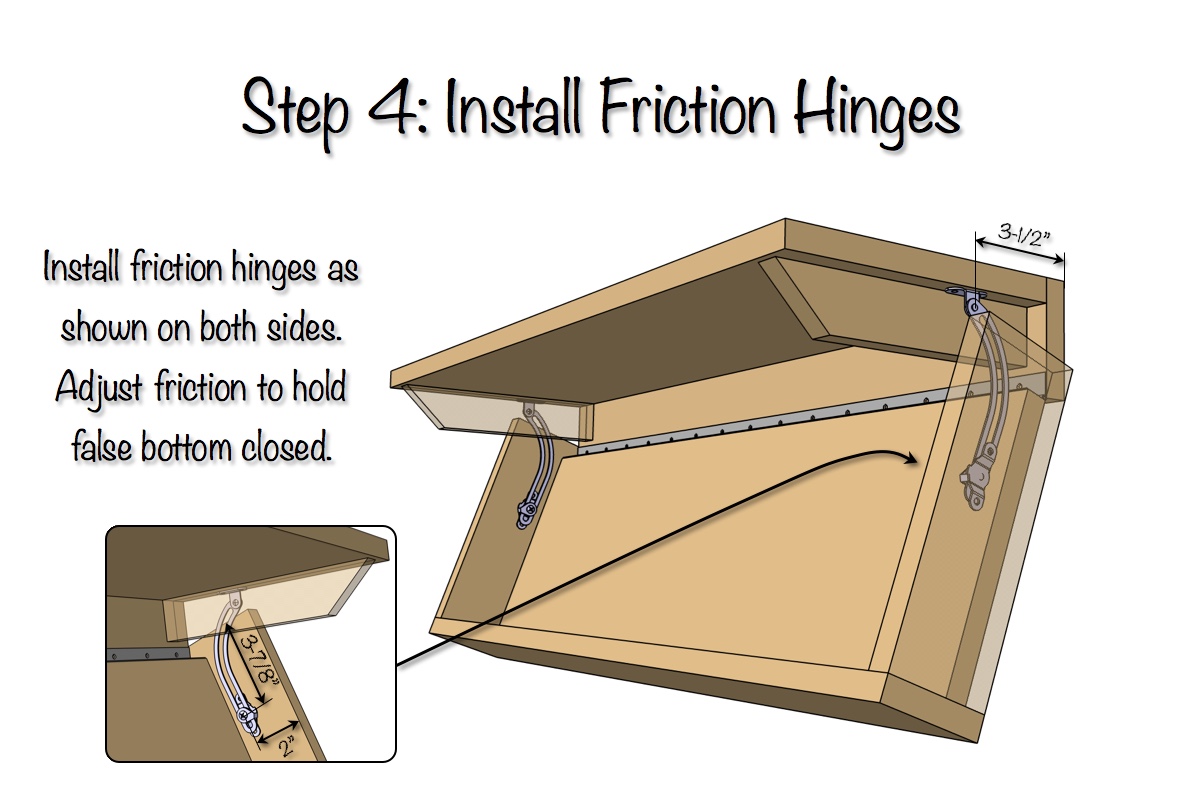
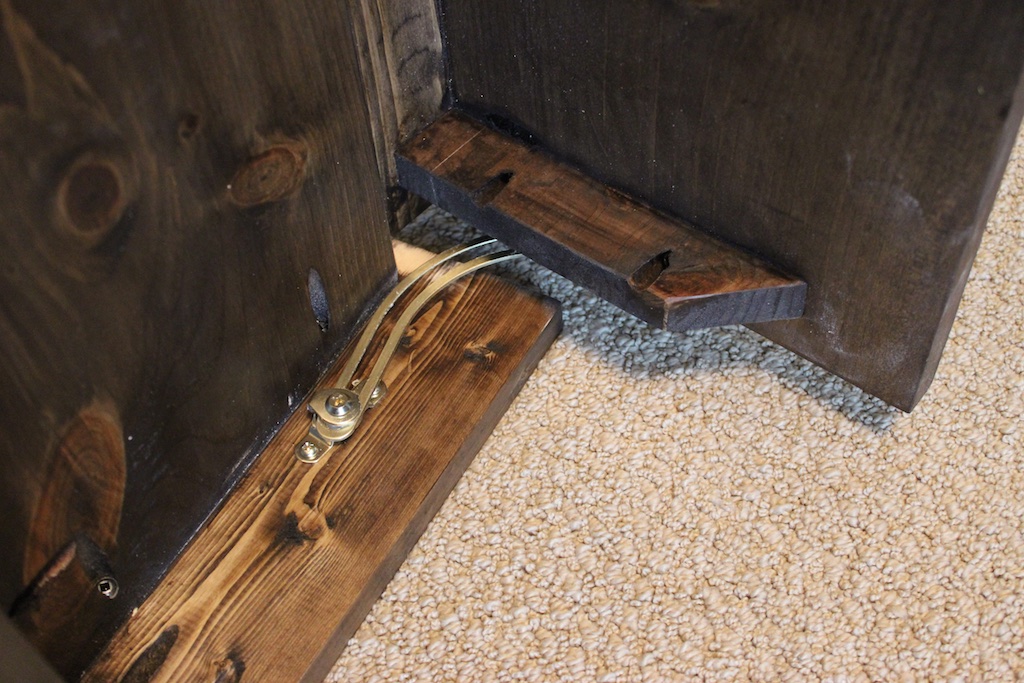
Install the left- and right-hand friction lid supports on both sides — positioned about 3-1/2″ in from the shelf edge up top and roughly 3-7/8″ down and 2″ in on the drop panel, as shown. Then adjust the friction tension so the false bottom stays closed on its own but opens with a firm pull. That adjustment is the whole trick — it’s what keeps the secret a secret.
Mounting
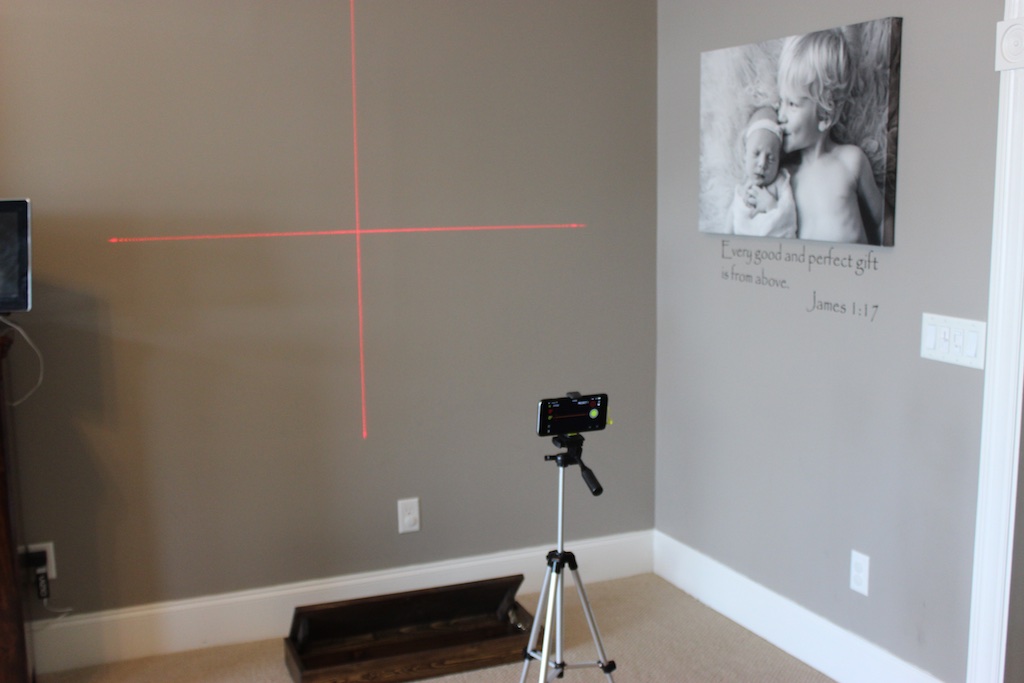
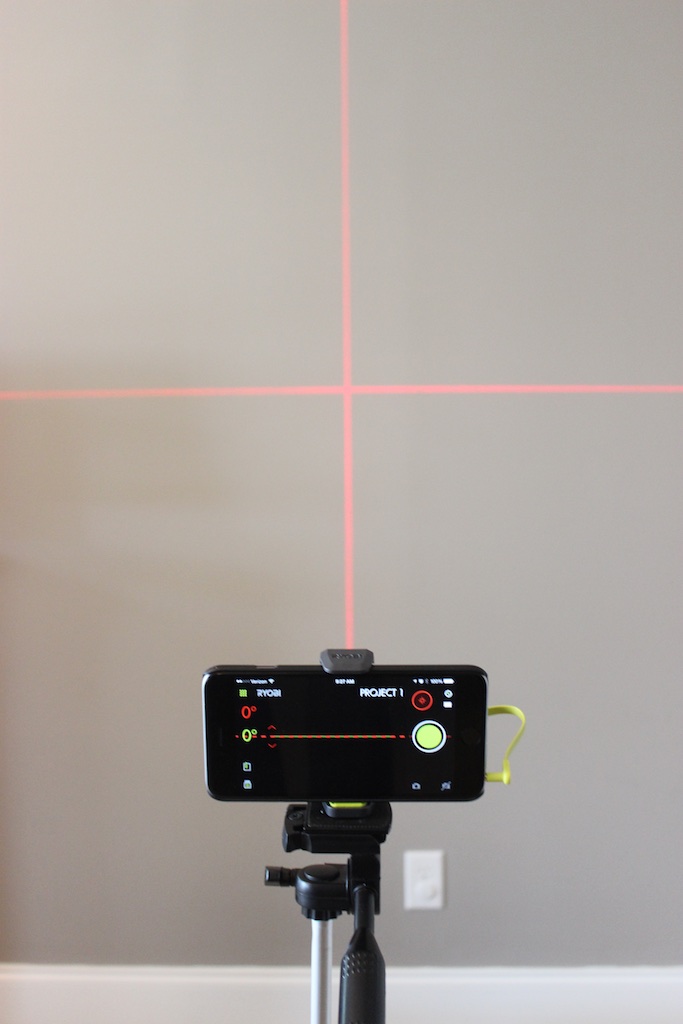
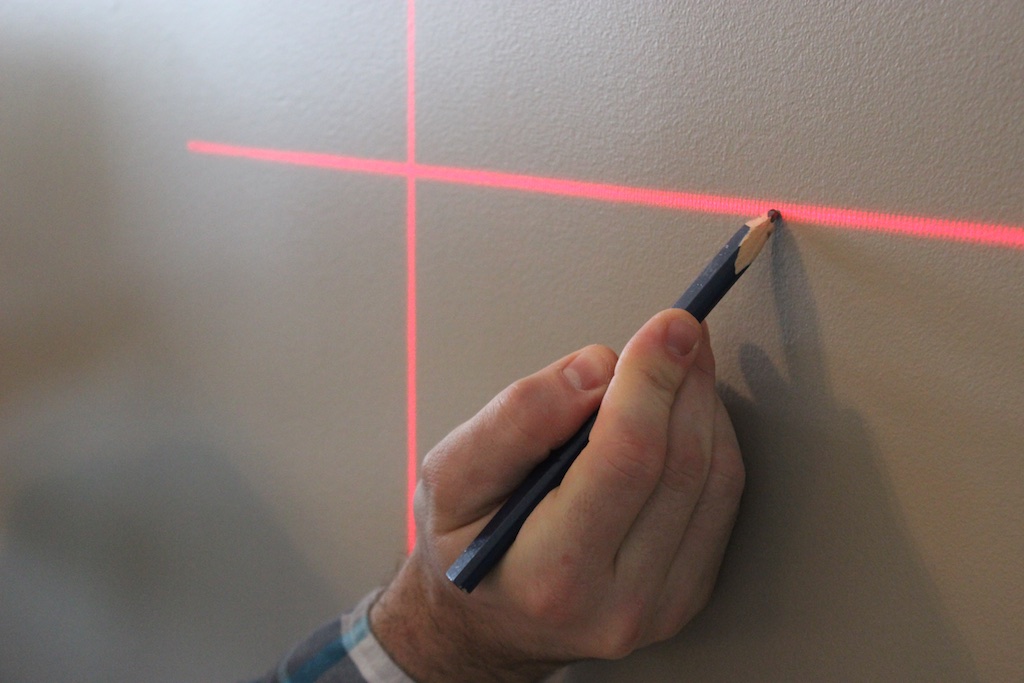
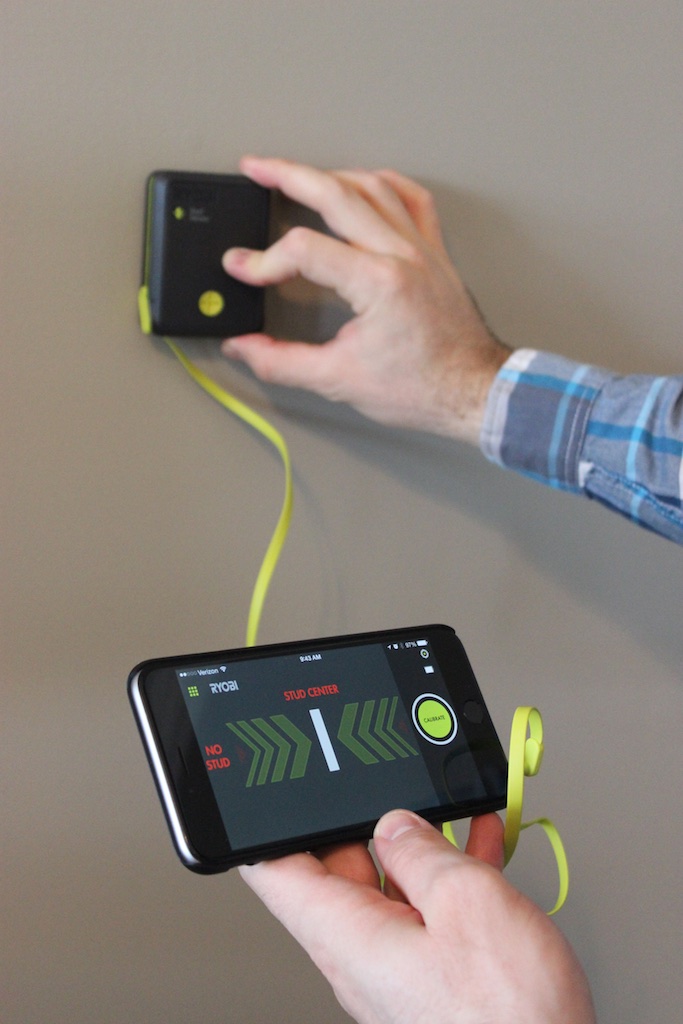
First, find the perfect spot for your new secret shelf and then mark a level line at the height you would like to mount it. Next, use a stud finder to locate and mark two studs. Mount the secret shelf using two 2-1/2″ wood screws per stud — driven through the 1×4 back so the compartment stays hidden.

The finished shelf
Concealment shelf questions, answered
How does the hidden compartment work?
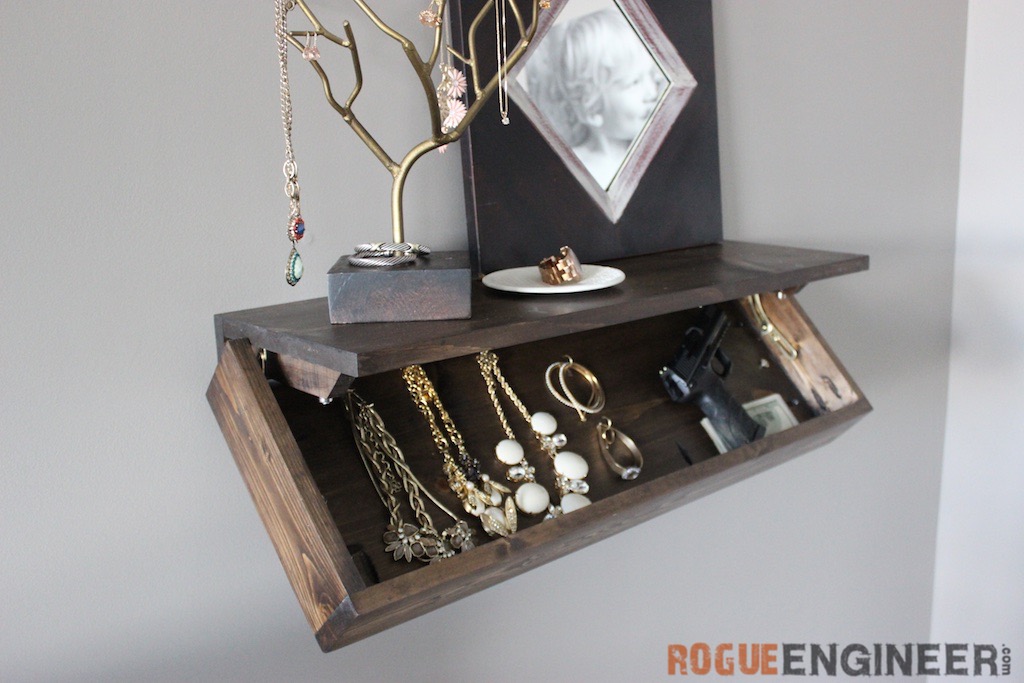
The bottom of the shelf is a false panel hung on a 30″ continuous (piano) hinge. Two adjustable friction lid supports — one left-hand, one right-hand — hold it closed and control the swing, so from below it reads as a solid built-up shelf. Pull the front edge and the whole bottom drops open like a glove-box door.
What can you store in a concealment shelf like this?
The compartment runs nearly the full 30″ interior length and about 9″ deep — keys, cash, documents, and small valuables all disappear into it. Plenty of readers build these as hidden gun shelves; if that’s your plan, follow your local safe-storage laws and keep it out of kids’ reach.
How much does a DIY secret shelf cost to build?
About $30: two pine 1x boards, a continuous hinge, and a pair of friction lid supports. The two hardware pieces are the only specialty items — everything else is standard pocket-screw joinery.
How do you mount a secret floating shelf?
Mark a level line, find two studs with a stud finder, and drive two 2-1/2″ wood screws per stud through the shelf’s 1×4 back. No visible brackets — the screws hide inside the compartment, which is exactly the point.
More builds for the walls
Questions? Comments?
As always, if you have any questions don’t hesitate to comment below and especially don’t forget to post pictures of your finished products in the comments! ENJOY!
The PDF download button doesn’t open the plans. How far in from the edge do you place the support arms?
Hey Brett I’ve updated the link for the printable PDF. The dimensions for locating the support arms are shown in step 4.
Thanks for the reply. The support arms I was referring to were the ones you mentioned in Step 2 (not the friction hinges in step 4). Is it safe to assume that the support arms in Step 2 can be placed the width of the 1×4 that you used on the sides of the false bottom?
Got it. Good catch. I’m pretty sure it’s 1″ but I’ll confirm and add the dimension tonight. Really you just need enough room for the friction hinge.
Have you thought about adding a hidden lock? I have actually been thinking of something similar to this and some other furniture pieces along the same principle for gun storage throughout my home for protection
Drew, I actually bought a Tot-Lok (Magnetic Lock) and it was such a pain to align it just right since this is not a standard installation (so their template doesn’t work) that I decided not to use it. That being said I think it could work I just didn’t have the patience that evening and I’m not actually going to store guns in here so locking wasn’t a necessity.
Alright I understand that. When I get my plans done with a hidden lock i will send them to you if you are interested. I do mine in Inventor though, I think i noticed somewhere that you are an engineer by day, so would you have the ability to open up an Inventor or Autocad DWG file? Im a CAD Designer/ Draftsman and just spend more time in inventor then i do sketchup.
Sweet. That would be awesome Drew! The best file format for me would be a .step file. I think inventor has those capabilities. Thanks man.
No problem! I can send a step file easily. As soon as I get my plans done I will share them with you. Thanks!
Hey Jamison,
I havent had the chance to completely model my plans for the Locking secret shelf just havent had the chance to finish it yet. But my idea was to use a false panel in either the front or the side that hinged on barrel hinges like these, http://www.rockler.com/hidden-barrel-hinges-select-size, and use that to hide the lock. But the other day I came across this magnetic lock, http://www.rockler.com/tot-lok-lock-mechanism, that i think would be able to be used in your existing design easily. I apologize ahead of time if those links arent allowed on here but I am in no way receiving any compensation from Rockler, just thought that you and others would find this info helpful. Thanks!
Never mind I see now in another comment that you already had the Tot-Lock. Well hopefully the false panel idea hinging on the barrel hinges will help as well.
Hey Jamison,I havent had the chance to completely model my plans for the Locking secret shelf just havent had the chance to finish it yet. But my idea was to use a false panel in either the front or the side that hinged on barrel hinges like these, http://www.rockler.com/hidd…, and use that to hide the lock. But the other day I came across this magnetic lock, http://www.rockler.com/tot-…, that i think would be able to be used in your existing design easily. I apologize ahead of time if those links arent allowed on here but I am in no way receiving any compensation from Rockler, just thought that you and others would find this info helpful. Thanks!
Thanks for sharing Drew, those barrel hinges would be nice for sure and the Tot Lok is what I would suggest as well.
Drew, I actually bought a Tot-Lok (Magnetic Lock)<img src=”http://ir-na.amazon-adsyste…” width=”1″ height=”1″ border=”0″ alt=”” style=”border:none !important margin:0px !important;”/> and it was such a pain to align it just right since this is not a standard installation (so their template doesn’t work) that I decided not to use it. That being said I think it could work I just didn’t have the patience that evening and I’m not actually going to store guns in here so locking wasn’t a necessity.
Love this plan and would also love a way to add a secret lock. I noticed another comment asking the same thing and hope you have one to share! Thank you!
I actually bought a Tot-Lok (Magnetic Lock) and it was such a pain to align it just right since this is not a standard installation (so their template doesn’t work) that I decided not to use it. That being said I think it could work and this would be the lock to do it.
I actually bought a Tot-Lok (Magnetic Lock)<img src=”http://ir-na.amazon-adsyste…” width=”1″ height=”1″ border=”0″ alt=”” style=”border:none !important margin:0px !important;”/> and it was such a pain to align it just right since this is not a standard installation (so their template doesn’t work) that I decided not to use it. That being said I think it could work and this would be the lock to do it.
When it opens does the back of the false bottom hit the wall? The corners look to hit the wall.
It doesn’t hit the wall Trevor. With the hinge point positioned where it is, the corner you are referring to swings up and away from the wall.
I have seen a couple of retail models of this (http://tacticalwalls.com/product-category/shelves/), but it is always great to see a DIY version at a reasonable price. I had a question though, can you see the hinge from underneath the shelf? I’m not sure what the necessary clearance is with piano hinge, but I guess that there should be at least a 1/16 inch gap between the wall. I was thinking about a similar shelf using a four bar mechanism (I’m an engineer too). There was an article over at the family handyman where they designed a shelf with similar dimensions using such a mechanism (http://www.familyhandyman.com/kitchen/storage/organization-tips-for-your-kitchen/view-all). You would have to use a piston damper instead of a friction hinge, but you would get effectively no gap between the wall and shelf. I would like to see if you could make that work. Thanks for the post
Thanks Hunter. You can barely make out the hinge from the bottom. I have my shelf mounted below eye level so you can’t see it unless you duck down. And this could always be camouflaged by spray painting the hinge to match the shelf. The bottom is ripped down to accept the hinge which is 1/8″ and the sides butt up to the wall so there is little to no gap there. The hinge point location causes this lower back comer of the sides to swing away from the wall. The four bar mechanism would work as well, if you end up going that route be sure to post a picture. I’d like to see how it turns out. I will say I tried to use a piston dampener and the friction hinge proved to be the simplest design.
What are the actual dimensions. I’m trying to build this out of ply wood and it’s not working
Yea this is built using nomial lumber so 1x4s are actually 3/4″ x 3-1/2″ and 1x10s are 3/4″ x 9-1/4″.
Thanks. I built it. And used the magnetic lock. I just have to paint it now. And make a couple more.
[…] For more pictures and written directions go HERE […]
What are the actual deminsion. I’m trying to build this out of plywood and it’s not working
Yea this is built using nomial lumber so 1x4s are actually 3/4″ x 3-1/2″ and 1x10s are 3/4″ x 9-1/4″.
Did you think about using flush mount hidden hinges at all? The type cabinet makers use to move their cabinet doors out away from the face of the cabinets. I’m having mental blocks on the mechanics of them, but I believe they would work without binding and without needing the gap.
http://www.amazon.com/Liberty-H01068C-UC-C5-Non-Mortise-Concealed-Spring/dp/B005YVKNFC/ref=sr_1_1?s=hi&ie=UTF8&qid=1425493303&sr=1-1&keywords=concealed+hinge
Hey Daniel, I looked at these hinges but i was worried about how they would function with the lid support I used. They could possibly work with a gas shock which would be really cool but I had trouble finding one small enough.
http://www.amazon.com/Liber…
How would you expand your plans for the 31-5/8″ up to a 48″ length? I am building a set of (3) secret floating shelves, with the first shelf at your current plans dimensions, another at 4ft length, and finally a shelf that spans 6th in length. I was contemplating if I need to add additional wooden supports, which would act as dividers. Thank you
Hey Mike, I would say to not worry about the extra support unless you’re carrying a lot of weight on the shelf. You can always add it later if you notice it start to sag.
Thanks for posting this for free and giving detailed instuctions. I would like to see some more concealment projects from you.
No problem Miceious, and I’m right there with you. I really like stuff like this too!
Hello!
Thank you for the clear, easy to build plans!
What is the device that you are using to mark your level on the wall? It looks like an iPhone with something plugged in?
Mark
Hey Mark, it’s the Ryobi Phone Works laser level.
Hello!
Great work.
Unfortunately i’m not used to your metric system and i’m not sure about your size.
Does 9 -1/8 ” stands for 231mm or 225 mm?
Thanks
Thanks Luca, 9-1/8 inches converts to 231.775 mm. Good luck!
What kind of level and stud finder were you using?
That’s from Ryobi phoneworks
Hello on the piano hinge is it 1/16 gap between the two shelfs or from the edge of the one?
The hinge is flush with the bottom shelf and has a 1/16″ gap from the side of the upper shelf. This also leave a 1/16″ between each shelf.
Love this plan! I’m having a real tough time with the friction hinges. The rounded tip of the arm is hitting the bottom shelf. I’ve tried raising the mount, but no joy. Any tips?
Hey Jon, Sorry you’re having such a hard time with this. You should be able to adjust the mount at one of the two points to make it work. The measurements that i provided in the plans worked for me.
LOVE THIS! Love all your projects with details please keep them coming maybe more pallet projects 🙂
Thanks! Will do!
What size friction hinge did you use? I only can seem to find 5″ at the local hardware storeso I just wanted to make sure I had the right hinge.
(http://www.homedepot.com/p/Schlage-Friction-5-in-Bright-Brass-Lid-Support-Right-Hand-Hinge-C9220F3-RH/202315143?keyword=friction+hinge)
Yes I used a 5″‘ friction hinge.
Thanks. I just found your site and want to applaud you on how well it is put together. I have recently started to get back into wood working with my 13 yr old daughter as she is showing an interest and your site will definitely keep us busy!!! Thanks again
Awesome man! I am so glad you found us. How cool of your daughter to get into woodworking. My son is 4 and my daughter is 1, they both seem to enjoy learning how to use tools. My son even draws his own table plans! ha! Happy building and if you ever run into any questions just shoot me a message.
I’m having a real difficult time trying to figure out how to adjust the friction lid supports. I don’t know how to adjust them to hold the shelf closed. Any tips?
Hey Lakyn, You can adjust the screw at the hinge joint to make it tight enough that the drawer won’t move on it’s own but just requires a little force to do so. If you’re not having any luck with that you can try added a magnetic catch to help keep the bottom up.
[…] DIY Secret Floating Shelf – Free Plans – Rogue Engineer. Feb 2, 2015 – Use these easy to follow, DIY secret floating shelf plans to build a floating shelf with secret hidden storage. This can be built for only $30! […]
[…] DIY Secret Floating Shelf – Free Plans – Rogue Engineer. Feb 2, 2015 – Use these easy to follow, DIY secret floating shelf plans to build a floating shelf with secret hidden storage. This can be built for only $30! […]
[…] DIY Secret Floating Shelf – Free Plans – Rogue Engineer. Feb 2, 2015 – Use these easy to follow, DIY secret floating shelf plans to build a floating shelf with secret hidden storage. This can be built for only $30! […]
[…] DIY Secret Floating Shelf – Free Plans – Rogue Engineer. Feb 2, 2015 – Use these easy to follow, DIY secret floating shelf plans to build a floating shelf with secret hidden storage. This can be built for only $30! […]
[…] DIY Secret Floating Shelf – Free Plans – Rogue Engineer. Feb 2, 2015 – Use these easy to follow, DIY secret floating shelf plans to build a … We decided to finish our secret shelf with Kona wood stain from Rustoleum. […]
I was going to make this for my hubby, but he ended up doing it since I was working on another project. He did a fantastic job and it is now hanging in our bedroom. He LOVES secret hiding places for around the home! Thank you for sharing the plans for this cool idea!
Reattaching photo that was removed
Thanks so much for sharing this. I really want to do this – I see alot of the expensive versions of this have a gas strut to assist with lowering the shelf. I have searched high and low – and hints on where i could look and what i should be looking for? Again – this project rocks – great work!
Thanks Tyson, try looking for a RV cabinet door support. When I was researching it that was what I though might work.
Check out http://www.mcmaster.com. They have all different kinds of gas struts. Although they can be a bit pricey.
Check out http://www.mcmaster.com. They have all different kinds of gas struts. Although they can be a bit pricey.
how do the corners of the false bottom not hit tge wall when opening and push it away from the wall?
With the hinge point positioned where it is, the corners you are referring to swings up and away from the wall.
Thank you so much for sharing! My grandma has been wanting one of these for about a year now and I am making one in shop class for her! Absolutely love it!!!
That’s awesome! And very nice of you.
I have a quick question about your hidden shelf plans….
I am making my shelf from Red Oak boards. Not the pine that you used so in your cut list you say to “Rip 1/8 in. off with the table saw”. on the 30 1/8 in. board. Then on the plans you show that board to be 9 1/8 in wide after you cut off 1/8in.? Shouldn’t that measurement be 9 7/8 in. instead? l FYI- mine are the full dimension 1 in. thick x 4in. wide x 30 1/8 in. long..
Thanks: Gary
Sorry I should have been more clear Gary. I used dimensional lumber in the plans so the 1×10 is actually 3/4″ x 9-1/4″ and the 1×4 is actually 3/4″ x 3-1/2″. Sorry about the confusion.
Could you still use the measurements that are in the graph above?
yes
Reattaching photo that was removed
so is the piece the u rip 1/8 off meant to be 9 7/8
A 1×10 board isn’t exactly 10″ wide. Just like a 2×4 is actually 1 1/2 x 3 1/2.
Great looking plans. I’ve been looking into building some of these for my self and a couple of friends/family members. One question for ya though. Have you done any with molding instead of the 1×4’s? at least for the sides and front of the drop down part?
I haven’t but that is a good idea. I’d love to see how it turns out.
The plans call for lumber in 1×4 dimensions but the lumber in home improvement stores don’t come in 1×4, they are usually 3/4 x 3 1/2 inches. Do you recommend purchasing the next width up and then sizing the piece to the 1×4 or just use the milled dimension. Thanks.
The lumber I call for is dimensional lumber so actual dimensions for the 1×4 are 3/4 x 3-1/2 and that is what should be used.
[…] Secret Floating Shelf: Use these easy to follow, DIY secret floating shelf plans to build a floating shelf with secret hidden storage. This can be built for only $30! (via Rogue Engineer) […]
So thanks for these plans! I am in the process of building 2 of these now, the only difference is mine are 42″ long. I used piano hinges that were one foot and two feet. Fits perfectly I will post more pics when I finish up. Thanks again for the plans!
Dustin, I want to make a bigger shelf, did you just add 12 more inches to the boards?
Yes sir! I made the boards longer kept everything else the same
Thank you sir
How do you latch it up, in closed position?
https://uploads.disquscdn.c…
That is awesome man! Can’t wait to see it finished up.
Done! They look great
That really does look amazing! Really great work man.
Nice job on the plans. I’ve been looking for something like this for a while. I added a top and some trim for a more traditional look. Thanks!
That really turned out great Don! Nice mods. Thanks so much for sharing!
What size friction lid support do you use?
5″.. Links can be found in the materials sections.
Without a table saw how do I shave 1/8″ off or adjust the plan to not have to shave 1/8″ off the wood?
You could try drawing a line and sanding down to it or clamping a board and running a circular saw down it to cut off 1/8″.
Would a router table work with the right bit?
Yes
Any issues with the drop down shelf gouging the wall when opened?
Not at all. It pulls away from the wall when opened.
hello I would like to know how to you install the piano hinge on the back side with out seeing it from under the box
hello one question have how do you hide the piano hinge from under the box so it can not be seen
Hey Paul, the piano hinge is barely visible from the bottom. If you didn’t want it showing at all you would probably need to go with another hinge.
What about a magnet lock in the front would that work. Also what do you think of using small gas struts instead of the friction hinge. They hold a lot of weight and cheap. Just looking at more ideas that might work
Yea, those are both good options. I was having trouble find a gas strut short enough and I actually tried the magnetic lock but positioning it just right was a royal pain.
Instead of a magnetic lock, you could always go the route of neodymium magnets and a flat metal plate. Or use dowel pins to line up your hole for your round magnet. (Drill a hole, insert a dowel pin and close the shelf. It’ll leave a mark on the other piece, and you can drill a perfectly lined up hole for your other magnet to sit in.) Then just make sure your magnets are expoxied in with the polarity in the right direction, and Bob’s your uncle.
This project is awesome! The plans were great with a few bumps, but I got it all figured out. Would love to hear if anyone found a decent gas shock that works and fits. Thanks for posting all of these great plans, I have the lumber for the Hope Chest for my boy coming soon.
A buddy and I ordered some but they came from Japan. Still waiting. But I did find some
Has anyone figured an easy way to lock this project with magnets? I have kids and would love to have this as a gun storage solution!
There is a magnetic lock called the top lock, however its not really easy to install.
[…] All woodworking plans free shelf plans; free shelf plans. $0.00. This free project is easy to make. Diy secret floating shelf free plans rogue engineer. Use these easy to follow, diy secret floating shelf plans to build a floating shelf with secret […]
[…] added some floating shelves above the serving bar in how to build floating shelves (houseofmeis). Diy secret floating shelf free plans rogue engineer. Use these easy to follow, diy secret floating shelf plans to build a floating shelf with secret […]
[…] Diy secret floating shelf free plans rogue engineer. Use these easy to follow, diy secret floating shelf plans to build a floating shelf with secret hidden storage. This can be built for only $30! Diy shelving projects & ideas diy. At diynetwork learn about shelving solutions including tips for constructing wall shelves, floating. Easy diy floating shelves! Shanty 2 chic. Pingback diy floating shelves pallet wood plans space() pingback floating shelves like this are. Diy floating shelf plans gumroad. In depth, 6 page downloadable pdf plans for making wood floating shelves. These detailed plans include. Diy floating shelf plans for the dining room. Diy floating shelf plans for the dining room. January 6, 2015 by shanty2chic. Hey there! Go check him. Ana white build a food storage shelf free and easy diy. Build a produce food storage drying rack! Free plans from anawhite was so kind to volunteer to build this food storage shelf for home diy; upholstered projects; Cheap, easytobuild storage shelves mother earth news. Diy. Doityourself projects and plans for anyone who can swing a hammer. Tweet. Cheap, easytobuild wood storage shelves 11/6/2009 31303 pm. Floating shelves plan guide how to build a. Mar 15, 2015 floating shelves are easy to put together and extremely useful. Here's how to build a. […]
Looks great over my couch. Thanks for the plans.
I included before and after pictures so you can see how big of a difference the shelves make in my living room.
Thats awesome! Thanks for sharing.
[…] rennie mackintosh doors, sliding wardobe doors, aura storage, worktops, diy delivery uk wide. Diy secret floating shelf free plans rogue. Use these easy to follow, diy secret floating shelf plans to build a floating shelf with secret […]
[…] week’s project, we made a couple of floating shelves. This diy wood floating shelf project is a. Diy secret floating shelf free plans rogue engineer. Use these easy to follow, diy secret floating shelf plans to build a floating shelf with secret […]
[…] Diy secret floating shelf free plans rogue engineer. Use these easy to follow, diy secret floating shelf plans to build a floating shelf with secret hidden storage. This can be built for only $30! […]
[…] a clever simple solution! Love anything that looks good, works well and is cheap and easy. What. Diy secret floating shelf free plans rogue. Use these easy to follow, diy secret floating shelf plans to build a floating shelf with secret […]